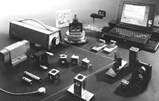
Dynamic Laser Calibrator

The 5529A laser-based calibration system provides the basic components to measure machine tool positioning and accuracy
The 5529A laser-based calibration system provides the basic components to measure machine tool positioning and accuracy, to use compensation data to correct positioning errors, to diagnose geometry problems, and to document machine performance. You can build your own system using laser sources, calibrator and material compensation boards, material and air sensors, optics kits, cables, and accessories or select one of three preconfigured systems.
The system operates at 0–40°C and has a measurement range up to 40 m with linear optics and up to 80 m with long range option. Laser head power is 100–120 Vac: 48–66 and 400 Hz; 220–240 Vac: 48–66 Hz; 50 W during warmup, and 33 W after warmup. Sample rates based on computer type and setup are 6.7 kHz (486/33), 12 kHz (486/66), and 33 kHz (Pentium 90).
Minimum system requirements include 486/33 MHz processor, 8 MB RAM, 1½ ISA slots, 3½ in. floppy drive, and Windows 3.1 or 95.
Hewlett-Packard Co., Test and Measurement Center, 9780 S. Meridian Blvd., Englewood, CO 80112. Tel: 800-452-4844; Fax: 303-662-3726.
